How to Chalk Kettlebells (Video Included)
How to Chalk Kettlebells (Video Included)
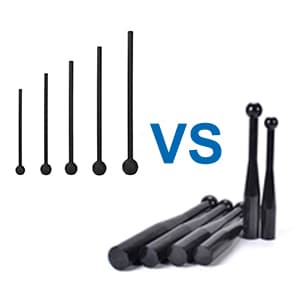
When I initially started kettlebell training I had no concept that chalking the kettlebell was so essential. And I had always simply chalked my hands as well as presumed that sufficed. Liquid chalking the kettlebell is vital for success to safeguard our hands. And do optimally when we’re lifting competitively, or recreationally with higher reps and a moist setting. How to chalk kettlebells properly? Here are the 4 actions:.
- Rough Up The Surface.
- Warm The Surface area.
- Apply Chalk Utilizing Rubbing From The Hand.
- Continue Chalking Up Until The Surface Area Is Covered Equally.
While chalking the kettlebell appears straightforward, there are in fact actions we must comply with to chalk the kettlebell properly. If we do not comply with these essential actions, we will not get the hand defense that we minimize the risk or need of losing our grip. In this write-up I’ll talk about why chalking our kettlebell is essential, just how to chalk the kettlebell appropriately, and also 3 usual blunders to prevent while chalking the kettlebell.
Exactly How to Chalk Kettlebells Effectively: Step-By-Step
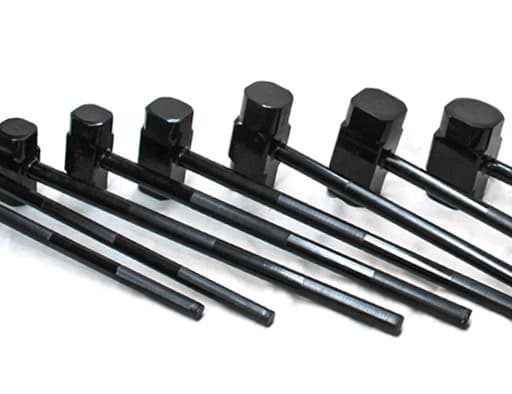
1. Rough Up The Surface area
It is very important to rough up the handle of the kettlebell before trying to use the chalk. This way the chalk will definitely adhere better to the handle.
If we’re liquid chalking a new bell, we’re going to use 150 grit (tool roughness) sandpaper. Because it will definitely be smoother than a used kettlebell. We need to scrape the handle to give the chalk something to grip and improve the chalk adhesion. If our kettlebell is not new and we are just re-chalking, then we can sand the handle with finer sandpaper to make the chalk adhere.
If we have a powder coat or e-coat the kettlebell, we may be able to ignore this step. This is because the texture of the coating on the handle is currently enough to provide a good base for the chalk.
2. Cozy The Surface
To make the chalk stick faster, we need to warm up the kettlebell handle ahead of time. This is done by massaging our hands boldly along the handle, or by applying liquid chalk between collections as we train. However, there is no real way to heat a surface, as everyone may have their own method. The secret is to get the handle over the room temperature. Once we start the process, it allows the chalk to stick to the kettlebell faster.
3. Apply Chalk Making Use Of Rubbing From The Hand
The best way to keep the chalk on the kettlebell is to scrub the chalk directly into the handle. Then utilizing rubbing from the hand up until the chalk begins to abide by the surface area. And I extremely advise positioning the kettlebell in a huge pail to avoid getting a lot of nasty chalk on the floor. We can begin using chalk by getting hold of a handful of chalk as well as massaging it into the handle using friction from our hand. The best method is to grip the handle with chalk in our palm and twist our return and forth on the handle to massage the chalk onto the handle.
Lastly, you also have to make additional chalking on the corners of the kettlebell. Also chalk where the handle bends on each side and connects to the bell. This is because these are critical areas for gripping and cleaning.
4. Continue Chalking Up Until The Surface Area Is Uniformly Covered
You have to keep rubbing the chalk into the kettlebell handle until the chalk starts to stick and evenly. This will definitely prolong the duration of the chalk before we need to repeat the process.
In the beginning, this process may take us longer. But gradually, we will use friction to apply the chalk more effectively.
It’s also important to remember that if we’re dealing with a newer kettlebell, the process will definitely take longer.
5. Video Constructions on How to Chalk Kettlebells
How Often Do You Need To Chalk a Kettlebell?
The duration of chalk will definitely vary. It depends on the number of repetitions we perform, the design of the training, and the humidity of the training environment. If we’re doing a workout designed for kettlebell exercises. If the workout includes longer collection times (10 minutes) and more snatch and clean reps, we may need to re-chalk. As this will definitely wear out the chalk fairly quickly.
If we’re doing lower representatives then simply liquid chalking the hands is most likely enough for keeping our grip. We can chalk the kettlebell whenever we feel as though there is insufficient chalk on the kettlebell to keep our grip, regardless of chalking our hands.
When Chalking A Kettlebell, 3 Mistakes To Prevent
- Using Water To Apply Chalk.
- Not Applying Sufficient Chalk.
- Stopping Working To Eliminate Old Chalk Prior To Re-Chalking.
1. Utilizing Water To Apply Chalk.
If we utilize water on the kettlebell handle to apply chalk, it creates the chalk to clump and produces a rugged surface area for us to grip which is harder on our hands and increases the danger of tearing open our hands.
To prevent tearing our hands, we ought to concentrate on warming up the kettlebell as well as using chalk utilizing friction from our palm rubbing/twisting on the kettlebell handle.
2. Not Applying Enough Chalk.
If we are not patient adequate as well as do not obtain a good layer of chalk on the kettlebell, after that the chalk that we did apply will not last very long as well as we will likely lose our grip and/or tear our hand.
This is extremely crucial for those competing in kettlebell sporting activity or crossfit, however likely isn’t too much of an issue for those doing fewer repeatings.
3. Stopping Working To Get Rid Of Old Chalk Before Re-Chalking.
If we do not get rid of excess chalk from the kettlebell handle before attempting to re-chalk the kettlebell, the chalk will certainly not stick and it will likely be gone after only one set.
To remove remaining chalk from the kettlebell handle and obtain the most effective adherence when re-chalking, we can utilize sandpaper from 80 grit to 150 grit to sand down to the surface area to provide the chalk something to grip.
Why Do We Need To Chalk Our Kettlebells?
We require to chalk our kettlebells to stay clear of excess wetness from influencing our ability to grip the kettlebell. Furtherly, it helps to reduce the danger of tearing open our hand. This is especially important when training with greater reps or humid conditions.
If we don’t use chalk, then we’ll likely struggle to keep the kettlebell from falling out of hand. Over time, this can lead to calluses. On top of that, since we hold the kettlebell harder, we may pre-tire our grip during a training session.
It is extra efficient to chalk the kettlebell handle as well as our hands when we’re training because the chalk on the kettlebell will last longer than the chalk on our hands, however we need to still chalk our hands to absorb the moisture to ensure that it does not transfer to the chalked kettlebell.
If we’re training with lower repetitions and also we are not in a moist environment, then liquid chalking the kettlebell is lesser yet I still suggest that we chalk our hands to avoid our hands from tearing (since it’s quite excruciating).
For whom Chalk is essential
- somebody who sweats easily
- completes in crossfit or kettlebell sporting activity,
- and/or trains with greater repeatings .
Frequently Asked Questions about Chalking Kettlebells
Is the Liquid chalking Process the Very Same for All Designs of Kettlebells?
The procedure for using chalk to a kettlebell is the same for all styles of kettlebell, however some kettlebells will keep chalk better than others– powder coated kettlebells will be the best kettlebells to hold chalk, with chrome as well as plastic kettlebells having the most awful chalk adherence.
Does It Matter What Brand of Chalk Is Made use of?
All chalks will definitely absorb moisture to keep hands from slipping. But I recommend looking for chalks that are not too “smooth” with a bit of grit, as it will definitely help the chalk stick to it and won’t rub off easily.
Do We Need To Chalk Kettlebells for All Kinds Of Kettlebell Training?
When we perform high-repetition competition design moves (snatch, clean, clean and jerk), we need to put the right amount of powder on the kettlebell. And in some cases it may not be necessary to beat as much powder on the kettlebell. If we were training with lower repetitions and/or more general fitness movements, just chalking our hands might suffice.
Does Chalk Boost the Danger of Tearing Our Hands?
Chalk actually reduces the risk of tearing our hands as long as the chalk is correctly used (without water). The chalk will certainly take in the moisture from our skin to stop the kettlebell from sliding around and pulling on our skin. Otherwise we would place us at a greater risk for tearing our hands.
Final Thoughts about Kettlebell Chalking
Discovering exactly how to chalk the kettlebell correctly will help us take our kettlebell training to the following degree. And it is essential to find out just how to chalk them appropriately. After that we could make sure that the chalk lasts much longer, and we can raise the amount of time in between having to reapply.